Looking to integrate MIDI into your setup without a computer? The Raspberry Pi is a game-changer for musicians! Whether you want to turn it into a USB MIDI Host Box or a MIDI Monitor, it can route, analyze, and optimize MIDI signals seamlessly. Let’s dive into how it works!
Using the Raspberry Pi as a USB MIDI Host Box
One possible use of a MIDI hat on a Raspberry PI is to transform it into a USB MIDI Host Box, allowing you to connect MIDI USB devices directly without the need for a computer. Using standard software like aconnect, the Raspberry PI can route and manage MIDI signals between various controllers, synthesizers, and other equipment, whether they have USB or traditional 5-pin connectivity.
This is particularly useful for:
- Interfacing MIDI controllers (e.g. keyboards, pads) with hardware synthesizers.
- Creating an autonomous setup for stage or studio use without relying on a PC.
- Transforming the Raspberry Pi into a MIDI sequencer or MIDI processing hub.
To manage MIDI connections under Linux, we can use aconnect.
The command aconnect -l lists all MIDI devices recognized by the Raspberry Pi.
$ aconnect -l
client 0: 'System' [type=kernel]
    0 'Timer           '
    1 'Announce        '
client 14: 'Midi Through' [type=kernel]
    0 'Midi Through Port-0'
client 16: 'Launchpad X' [type=kernel,card=1]
    0 'Launchpad X LPX DAW In'
    1 'Launchpad X LPX MIDI In'
client 128: 'MIDI' [type=user,pid=331]
    0 'MIDI In         '
    1 'MIDI Out        '
In the example above, I connected a Launchpad X to the USB hub, and it appears as client number 16 in ALSA (Advanced Linux Sound Architecture). Client 128 corresponds to the MIDI TRS interface linked to the Domoshop SLIM MIDI Hat.
The same aconnect utility allows you to connect MIDI ports together. The syntax is aconnect [-d] [-options] sender receiver. You need to add the -d option before to disconnect two MIDI ports. You can also use the names of the MIDI ports instead of numbers.
So, to connect our Launchpad X to the MIDI output of the hat, we run:
$ aconnect 16:1 128:1
# You can also use names instead of numbers!!
$ aconnect 'Launchpad X':1 'MIDI':1
Let's check if our two friends are talking to each other:
$ aconnect -l
client 0: 'System' [type=kernel]
    0 'Timer           '
    1 'Announce        '
client 14: 'Midi Through' [type=kernel]
    0 'Midi Through Port-0'
client 16: 'Launchpad X' [type=kernel,card=0]
    0 'Launchpad X LPX DAW In'
    1 'Launchpad X LPX MIDI In'
    Connecting To: 128:1
client 128: 'MIDI' [type=user,pid=298]
    0 'MIDI In         '
    1 'MIDI Out        '
    Connected From: 16:1
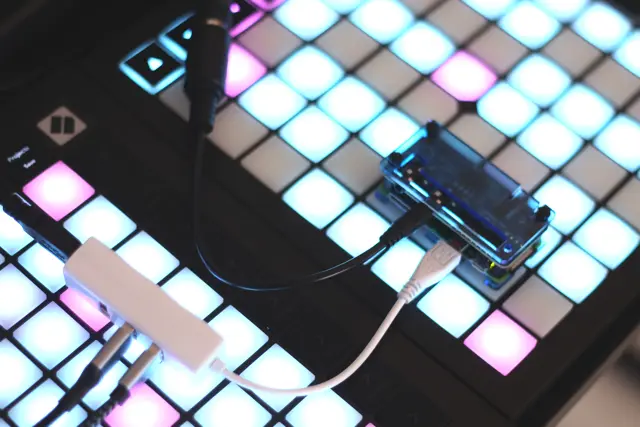
PI with USB Hub, Midi Hat, and blue plexi protection
Great, that's working! We can see it in the lines containing 'Connecting to' and 'Connected from'.
Let's make things a bit more interesting, shall we? What if we have multiple Launchpads that we want to automatically connect to the MIDI out every time the Raspberry Pi reboots?
Alright then, I propose a little script for that, which we'll call connectall:
#!/bin/bash
# Get the list of clients and ports from `aconnect -l`
aconnect -l | awk '/client [0-9]+:/ {client=$2} /^[ \t]+[0-9]+ / {if ($0 ~ /Launchpad/ && $0 !~ /DAW|DIN/) print client""$1}' | while read port;
do
    # Connect only Launchpad ports, excluding DAW and DIN
    echo "Connecting $port to 128:1"
    aconnect "$port" 128:1
done
echo "All Launchpad MIDI inputs (excluding DAW and DIN) are now connected to MIDI Out (128:1)."
Create this script in your $HOME directory and run it to check that everything works (and don’t forget chmod 755 connectall). This version works with Novation Launchpads and avoids connecting MIDI IN ports or those reserved for the DAW (because, of course, we're going Dawless, right??).
$ aconnect -l
...
client 24: 'Launchpad X' [type=kernel,card=2]
    0 'Launchpad X LPX DAW In'
    1 'Launchpad X LPX MIDI In'
    Connecting To: 128:1
client 28: 'Launchpad Pro MK3' [type=kernel,card=3]
    0 'Launchpad Pro MK3 LPProMK3 MIDI'
    1 'Launchpad Pro MK3 LPProMK3 DIN'
    Connecting To: 128:1
    2 'Launchpad Pro MK3 LPProMK3 DAW'
client 128: 'MIDI' [type=user,pid=439]
    0 'MIDI In         '
    1 'MIDI Out        '
    Connected From: 24:1, 28:1
Great, everything is connected properly! To run this wonderful script at every reboot of your Raspberry Pi, type crontab -e and add the following line: (the 'sleep' command is there to give ttymidi some time to start).
@reboot sleep 15 && /home/pi/connectall
Using the Raspberry Pi as a MIDI Monitor
For example, in a situation like "Why isn't my synth playing the note I'm pressing?", a MIDI monitor on the Raspberry Pi can help check if the MIDI message is being sent correctly, if it's properly transmitted to the synth, or if there's an issue with the channel, velocity, or configuration.
The aseqdump command is here to help you see things more clearly! You need to use the -p option with the name of an input port:
$ aseqdump -p 'Launchpad X':1
Waiting for data. Press Ctrl+C to end.
Source  Event                  Ch  Data
 20:1   Note on                 1, note 56, velocity 28
 20:1   Channel aftertouch      1, value 6
 20:1   Channel aftertouch      1, value 27
 20:1   Channel aftertouch      1, value 47
 20:1   Channel aftertouch      1, value 58
 20:1   Channel aftertouch      1, value 64
 20:1   Channel aftertouch      1, value 67
 20:1   Channel aftertouch      1, value 70
 20:1   Channel aftertouch      1, value 73
 20:1   Channel aftertouch      1, value 72
 20:1   Channel aftertouch      1, value 71
 20:1   Channel aftertouch      1, value 63
 20:1   Channel aftertouch      1, value 53
 20:1   Channel aftertouch      1, value 34
 20:1   Channel aftertouch      1, value 0
 20:1   Note off                1, note 56
There you go, it's as simple as that!
There are tons of other possibilities with your Raspberry Pi, like adding a MIDI filter with Midish. In the meantime, feel free to check out my other articles linking Music and Raspberry PIs.
If you have other Raspberry MIDI ideas, let me know in the comments below! And to support the blog, you can take a look at my favorite MIDI controllers 🙏
Speak your mind