Turn the built-in Envelope Follower into a mastering-grade dynamics tool (in 10 minutes)
TL;DR Ableton Live doesn’t offer a truly slow compressor or gain rider for mastering highly dynamic material. By editing the built-in Max for Live Envelope Follower, you can create a custom version with release times of 30 seconds or more — perfect for smooth, musical gain riding.
I needed a gain rider — or a really slow compressor — to quickly master live music with a lot of dynamics. I searched everywhere: plugins, the built-in compressors in Live Suite, Max for Live user devices… but nothing behaved the way I wanted.
The slowest compressor available in Live is the Multiband Compressor, which can go up to a 10-second release time. Unfortunately, that still wasn’t enough in my case.
Live’s Envelope Follower looked promising. But once again, the release timing wasn’t ideal (and honestly… who thought a release time in percent was a good idea?!). Still, since it’s a Max for Live device, it can be edited and turned into whatever we want.
To think I spent hours searching for a device or plugin that didn’t really work — when in ten minutes I could have modified an Ableton device myself! Let’s go through it step by step.
Editing the Envelope Follower
The goal is to modify the Envelope Follower so it supports release times of several dozen seconds.
It’s surprisingly easy to edit it and make it do exactly what you want. In about 10 minutes, you’ll have the device you need:
- Drop the Envelope Follower onto one of your tracks.
- Click the three dots (…) on the device and choose Edit in Max.
- The Max window will open after a few seconds.
- Click the Presentation Mode and snowflake icons at the bottom to switch to edit mode.

You should now see something like this:
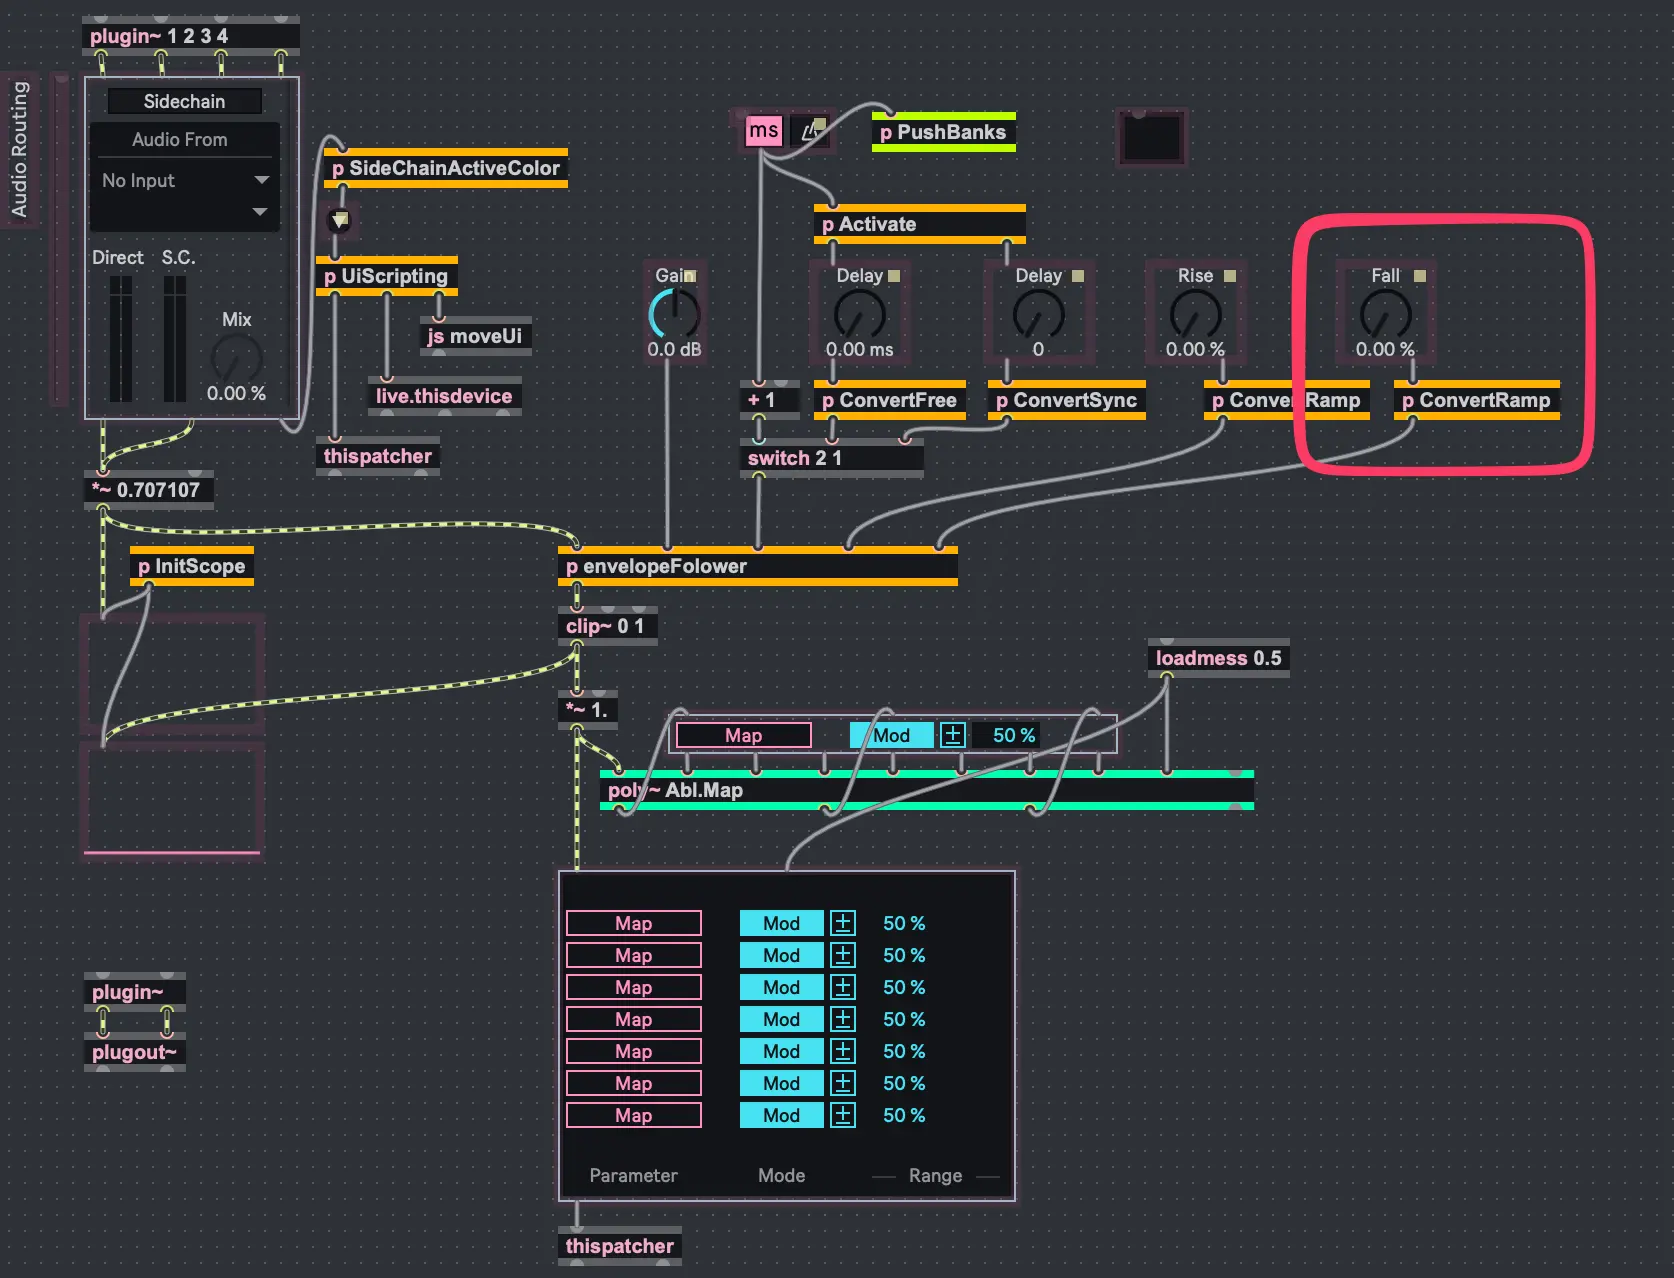
In red, you’ll notice the original Release dial connected to a block called ConvertRamp. That’s what we’re going to modify.
Step 1 — Remove ConvertRamp and replace with other blocks
- Select the ConvertRamp block and press Delete.
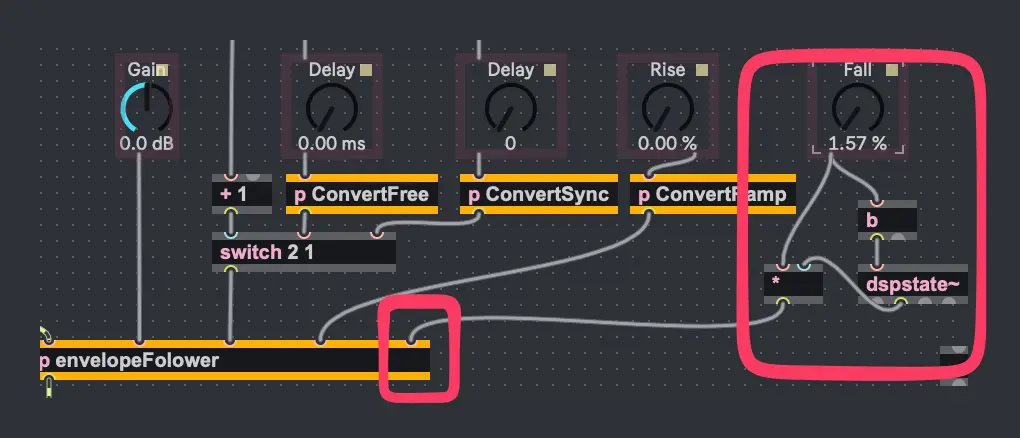
- The envelopeFollower block in the center expects values in samples per second.
- Add a dspstate~ object: press
n, then typedspstate~. - Add a multiplication block: press
n, then type*. - Add a bang object: press
n, then typeb.
Step 2 — Connect the blocks
Now wire everything up like this:
- Connect the lower-left outlet of the release dial to both the
bobject and the*object. - Connect the first outlet of
bto the upper inlet ofdspstate~. - Connect the second outlet of
dspstate~to the second inlet of*. - Finally, connect the lower outlet of
*to the right inlet of envelopeFollower.
It should look like this:
Now click your Fall dial, then click the (i) button on the right to open its Inspector.
Here you can customize the widget’s appearance and behavior:
- Change its color
- Display a numeric value instead of a percentage
- Set the unit to seconds using the Custom Unit property (e.g.
s)
Using Your New Slow Envelope Follower
Once you’re happy with the result, close Max. You’ll be prompted to save the device under a new name.
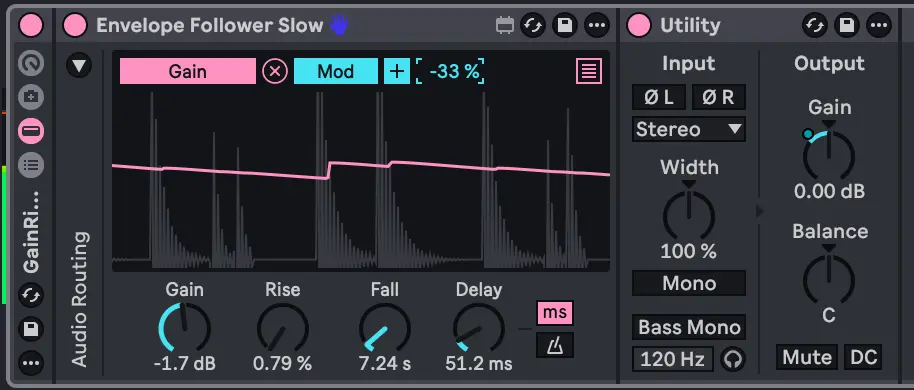
Try it out with a drum loop:
- Add your new Envelope Follower to the track.
- Add a Utility device after it.
- Map the Envelope Follower’s modulation to the Gain knob of Utility (or even directly to the track fader — why not?).
Now use the modulation amount to control how much gain reduction is applied. With the new Release knob, you can easily go up to 30 seconds or more and hear how smooth the gain changes become. The Gain control on the Envelope Follower now behaves like a compressor threshold.
By subtly adjusting the release, gain, and modulation amount, you’ll get exactly the kind of slow, musical gain-riding effect you were looking for.
Here is the final device:
Final Thoughts
I hope this showed you how easy it is to adapt existing devices in Ableton Live — and that you’re now at least a little less intimidated by tinkering inside Max for Live.
If this article was useful and you enjoyed it, and you’d like to support my blog, feel free to check out my Patreon below. I share lots of Ableton Live MIDI and sound packs there.
- The SHLDMusic Patreon ⭐️
Happy hacking — and long live absurdly slow release times! 🎛️
Speak your mind