If you make music and use the excellent Davinci Resolve to edit your music videos, chances are you have a Novation Launchpad on hand. But did you know that you can use your Launchpad X or Launchpad Mini mk3 as a fast and cheap controller for Davinci Resolve?
Davinci Resolve is probably the most popular video editing software out there, it's extremely powerful and pretty easy to use. I started using Resolve a while back and have since done videos for clients with it. This guide gives you some useful tips and tricks that will make editing a breeze and recycle a Novation Launchpad.
With the latest Launchpad firmware update, you can create a Custom Mode that will map convenient keyboard shortcuts for Davinci Resolve. With a few well-thought-out shortcuts you can speed up your editing workflow on Davinci, for much less than a Speed Editor. You can get a Launchpad Mini for 100€.
Here are the prerequisites:
- A Launchpad X or Mini mk3 lying around 😁
- The firmware version 2.0
- My Custom Mode adapted to Resolve
- Any version of Davinci Resolve
- Reset your Davinci keyboard shortcuts to the default ones
The Launchpad / Resolve mapping chosen
The mapping I chose to speed up editing on Resolve, is inspired by the "My Favorite Keyboard Shortcuts in Resolve" video by Casey Faris. Casey's shortcuts help editing in the Cut and Edit page.
⚠ Warning! If you want to use my Launchpad shortcuts, you must not have customized Resolve's keyboard shortcuts! For example, * Control+\ * must do a 'Split'. The Launchpad will just replay these standard shortcuts.
If you're new to Resolve and don't understand how to use the shortcuts to edit in the Cut page you should really watch the video above.
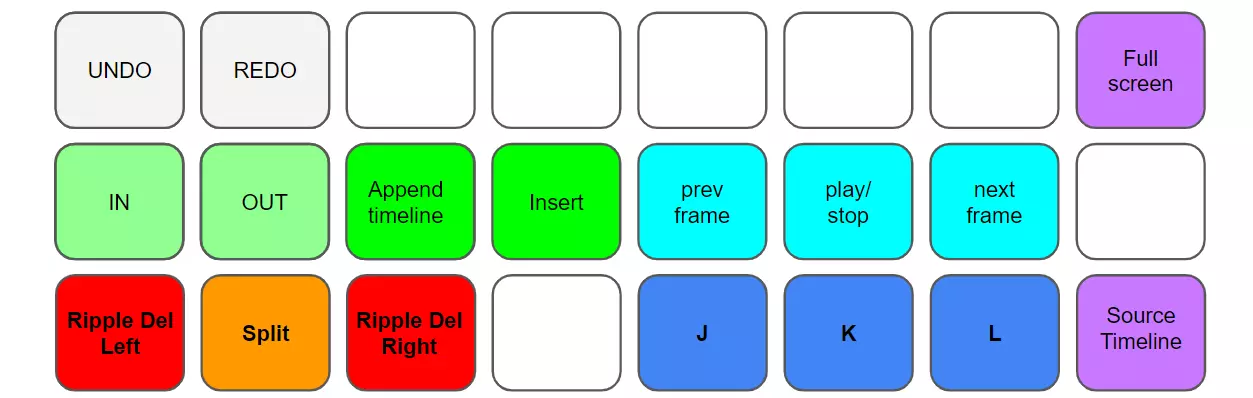
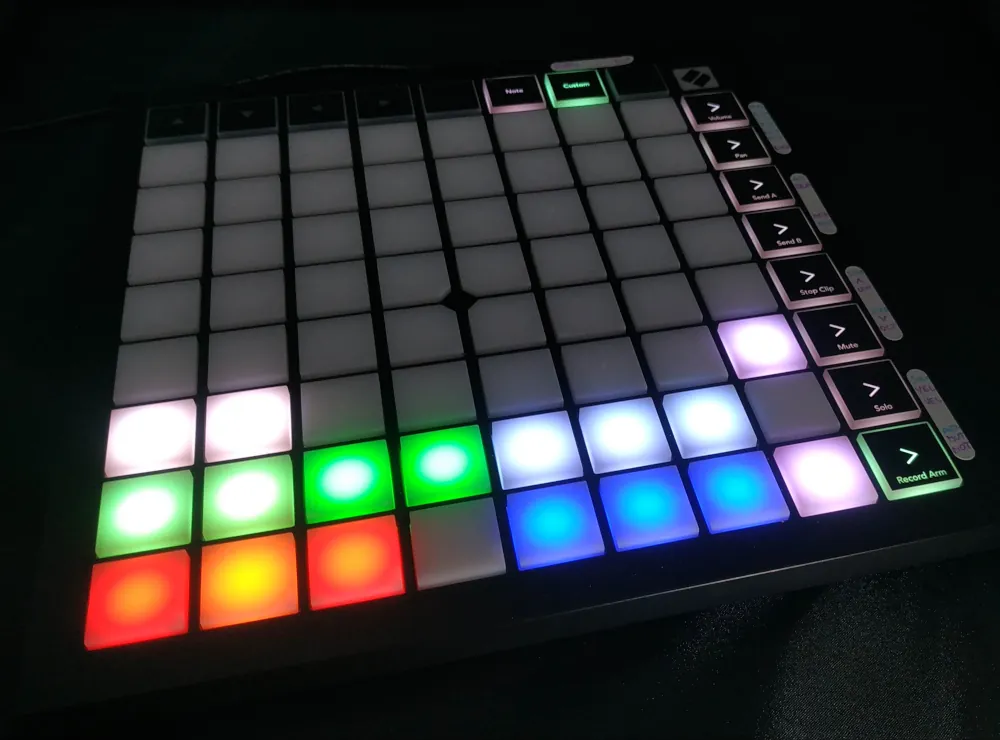
On the left of the Launchpad, we have the equivalent of Casey's QWS and IOP keys. With the 2 first green pads, you will mark in/out your source clip, and then append that part to the timeline, to get a rough cut. When you switch to the timeline or on the Edit page, you will use the red/orange pads, to Split, and Ripple Delete to the left or right:
- The two white buttons are dedicated to : Undo / Redo
- The four green buttons are set to: IN / OUT / Append to timeline / Insert
- The three red buttons will allow quick cutting on the Timeline: Ripple Delete left / Split / Ripple Delete right
On the right, you will have what you need to move the playhead on the timeline or the source clips:
- The top three light blue buttons: Play one frame left / Play and stop / Play one frame Right
- The three darker blue buttons are equivalent to the JKL keys: Play reverse / Stop / Play forward
- The purple buttons are used to go fullscreen and, to switch between the Source and the Timeline
In the end, I only used 3 rows out of the 8 of the Launchpad, so there is room to improve this layout for multicam for example, or add Color page shortcuts.
The Resolve Custom Mode to install on your Launchpad
Here are the SysEx files to install on your Launchpad X, for Windows and MacOS users:
Go to Components, import the SYX file, and install it on one of your Custom Modes.
If you have ideas to improve this simple mapping, please comment below 😉
Speak your mind