How to use a Novation Launchpad with your Roland MV1 or MC-707, mimicking an Ableton Live setup for live performances? These are my best advices to level-up your dawless live performances!
Did you know that on Roland grooveboxes, it is possible to trigger any clip on any track, a bit like ableton live session mode? You just need to connect an external MIDI controller 😁.
This feature is particularly interesting on the Verselab MV-1, because by default, when you activate section 1, then you also launch clip 1 of track 1,2,3...7. By using an external MIDI controller, you can launch any clip and no longer have this constraint. Now you can create really dynamic and varied live sets!
For the setup described below, you should use the Novation Launchpad Pro Mk3. I specifically recommend this model because it has the essential MIDI out capabilities needed to integrate seamlessly with Roland grooveboxes. Unlike some other Launchpad models that only offer USB Midi out, this one gets the job done.
The ultimate aim is to:
- Expand live performance options by overcoming the default limitations of Roland grooveboxes, such as simultaneous clip launches across tracks.
- Create dynamic and varied live sets by triggering individual clips independently, leading to a more versatile and expressive performance setup.
Launchpad Custom Mode for the MV-1 and MC-707
The custom mode enables you to program the Launchpad's buttons to send specific MIDI messages (Program Changes) to your groovebox. This programming is crucial for triggering the correct actions on the MC-707/101/MV-1, such as starting different patterns and sequences.
To create such a custom mode:
- Use Novation Components Software: Access the Novation Components software to create and configure the custom mode.
- Select Your Device: Choose the Launchpad model in the software.
- Create a New Mode: Start a new custom mode for a blank template.
- Map Buttons to MIDI Channels: Assign each row of buttons on the Launchpad to correspond with different MIDI channels on the MC-707.
- Add Program Changes, PC buttons: Program each button to send specific program change messages, which correspond to actions on the MC-707 like launching different clips or scenes. Sending a PC1 to channel 1, will activate clip 1 on track 1. PC2 on channel 5, will start clip 2 on track 5, etc.
- Color Code Buttons: Assign colors to the buttons for different functions (e.g., green for active clips) for better visual management during live performances.
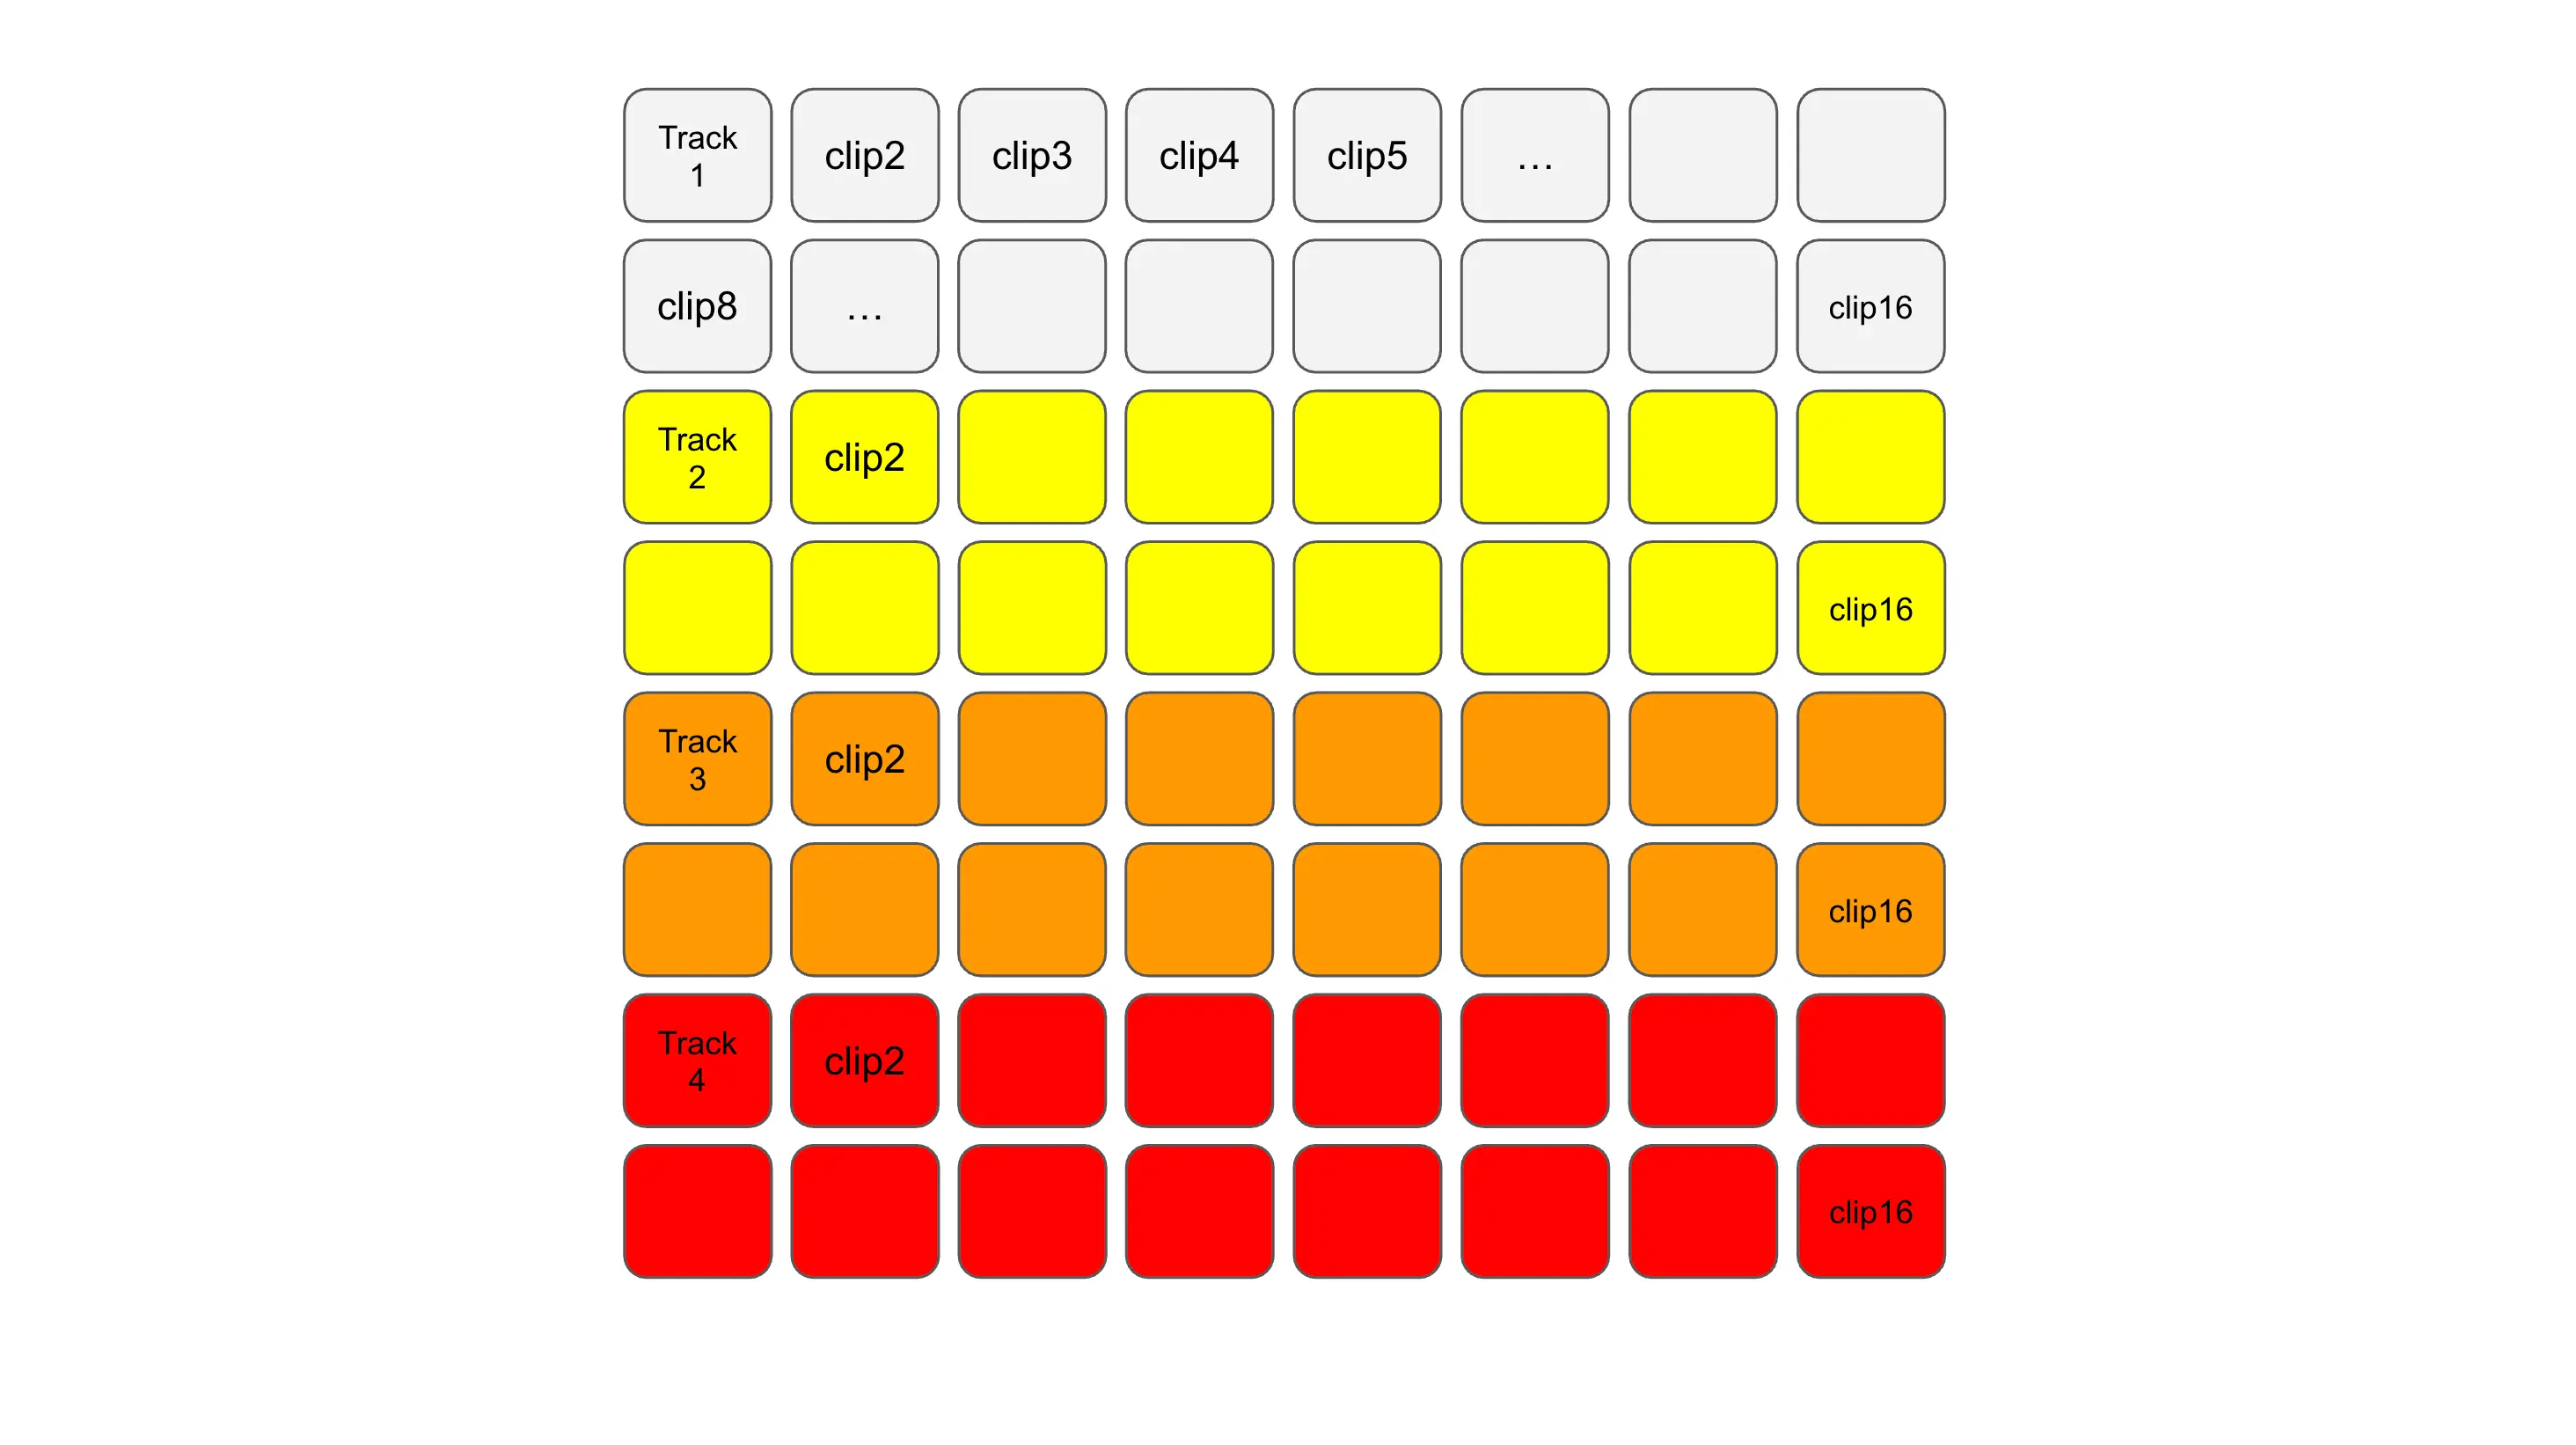
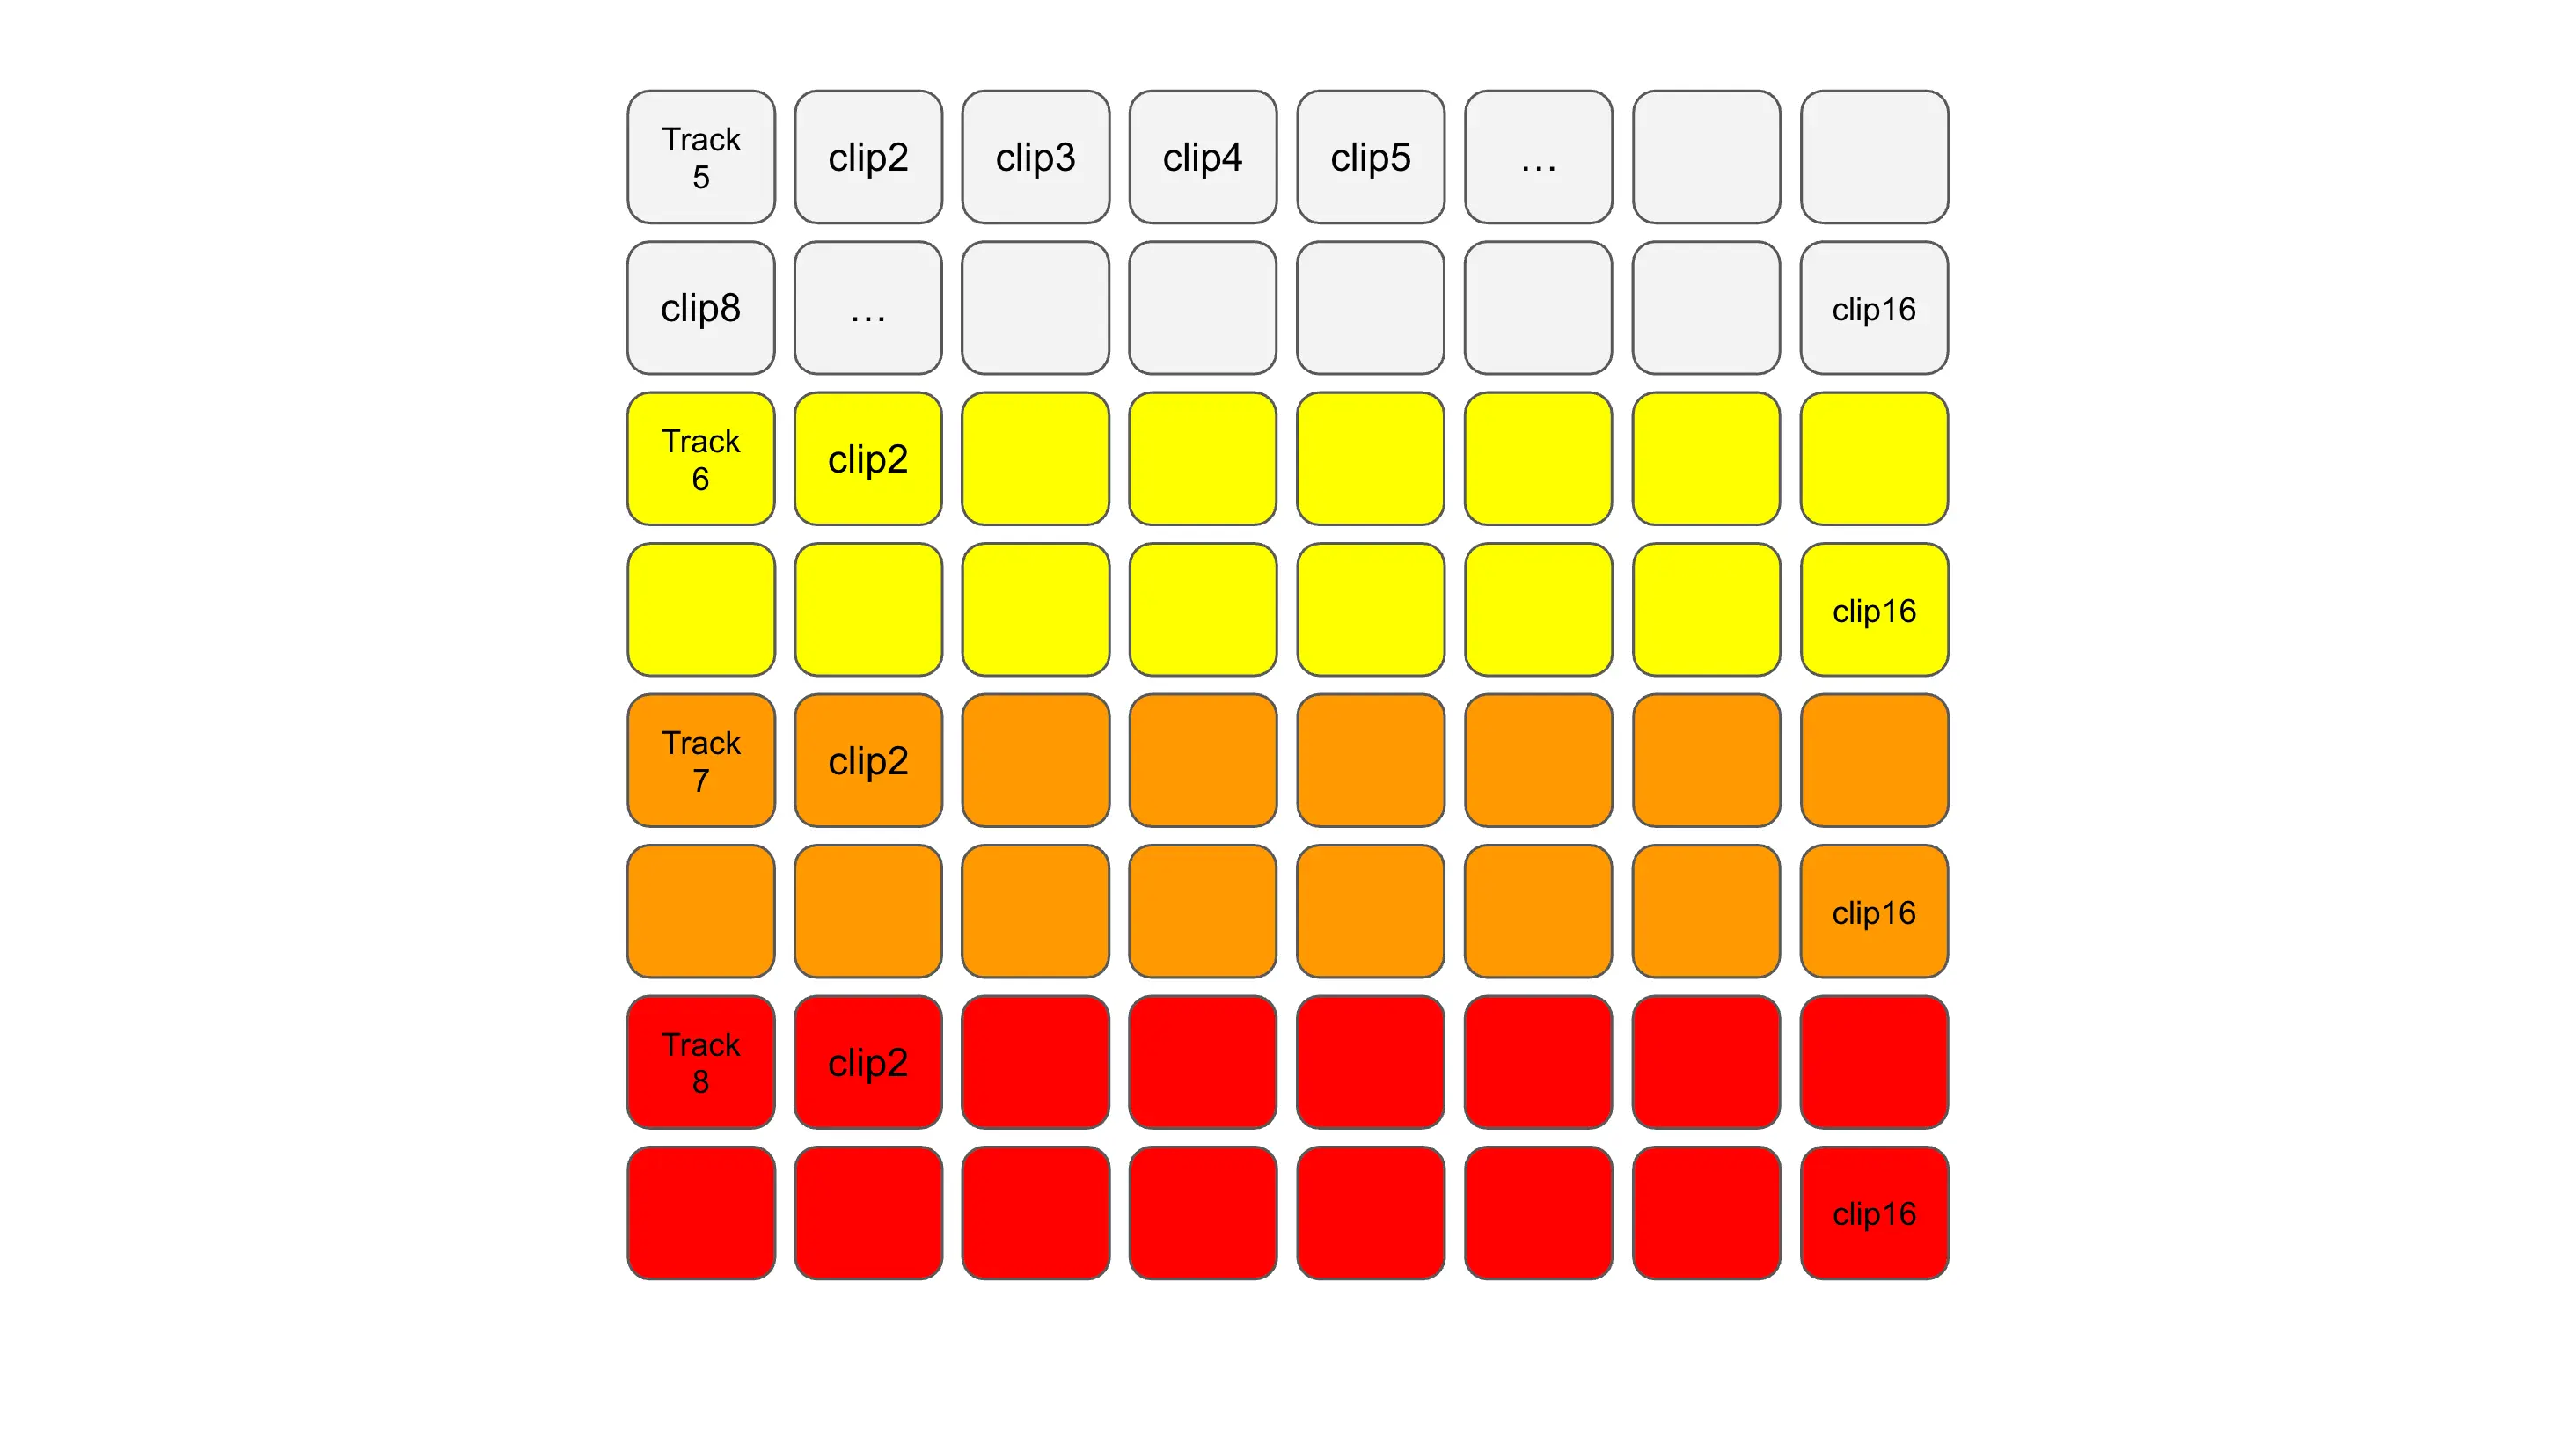
To save you lots of precious time, below are my mappings. You'll have to load them to 2 custom pages on your launchpad, if you want to control 16 clips on 8 tracks (128 pads needed).
For them to work properly, your 8 or 7 tracks need to be mapped to MIDI channels 1 to 8, as I do. Otherwise you'll have to re-edit them with Components.
Mapping for tracks 1 to 4

Mapping for tracks 5 to 8

Testing clip triggering
Now we can move on to testing our custom mode, freshly loaded into your Launchpad. Note that if you have a Midi USB host box, or a USB Midi bluetooth converter (Mvave MS1), you can also use these custom modes on a simple Launchpad X or mini.
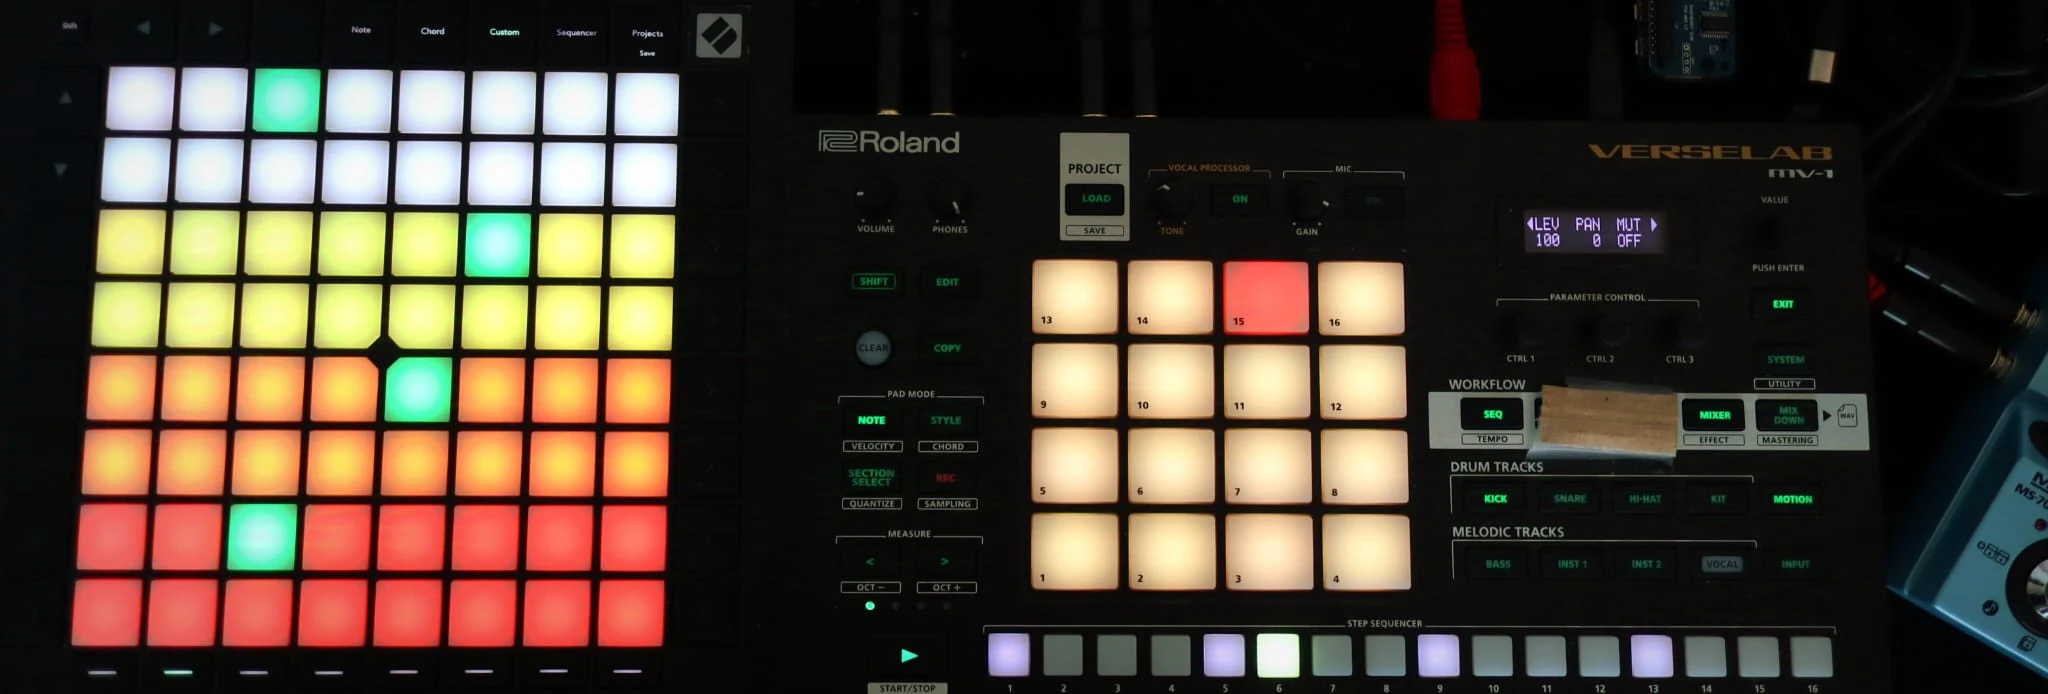
- Launch your favourite set on your Groovebox, and activate one of the pads.
- In my layout above, I think it’s pretty clear: each color represents a track, and each pad corresponds to a clip, starting with track 1 at the top.
- Activating a pad will allow you to change clip after a sync delay of 4 beats. This delay does not appear to be adjustable, but it is useful for synchronising changes on several tracks at the same time.
If you prefer a vertical layout, a la Ableton, let me know in the comments, and I'll make some other custom modes.
You'll see how these custom modes can liberate and improve your live performance, whether you're using a Verselab MV-1 or an MC-707 (it also works on an MC-101 but I find the benefit a little more limited). You can also download some custom modes I use to control the MV-MC synth parameters.
The Launchpad gives me an expanded and more intuitive control surface, making it easier to manage complex arrangements or live sets.
If you want to support my blog, you can buy my favorite hardware MIDI controller below 👍


Speak your mind